
If you’re into vlogging, you already know that recording is only half the job. The real magic happens during vlog video editing. This is the stage where you take raw clips, polish them, and transform them into a story your audience will actually enjoy watching.
Good editing can make the difference between a vlog people skip after 30 seconds and one they binge-watch until the end.
But don’t worry—you don’t need to be a professional filmmaker to edit vlogs. With the right tools, tips, and mindset, anyone can learn the art of vlog video editing. Let’s dive into the details step by step.
What is Vlog Video Editing?
Vlog video editing is simply the process of shaping your raw footage into a finished video that tells a story. This includes trimming unwanted parts, arranging clips in order, adding transitions, inserting music, applying filters, and sometimes including text or special effects.
Think of it like cooking: your raw clips are the ingredients, and vlog video editing is how you season and plate them so they look and taste amazing.
Why is Vlog Video Editing So Important?
You might be thinking, “Why can’t I just upload my raw clips?” Well, here’s the truth: audiences have short attention spans, and messy footage doesn’t keep them watching.
Here’s why editing is so important:
- Keeps viewers engaged – By removing boring moments and keeping things moving.
- Boosts professionalism – A polished video looks like you put effort into it, which builds trust.
- Strengthens storytelling – Editing helps your vlog flow like a story, not just a bunch of random clips.
- Showcases your personality – Through music, graphics, and editing style, your unique voice comes alive.
In short, vlog video editing makes your content enjoyable and binge-worthy.
Step-by-Step Guide to Vlog Video Editing
Here’s a simple roadmap for editing your vlog like a pro, even if you’re just starting out:
1. Organize Your Clips
Start by importing your footage into your editing software. Create folders for different scenes or days if needed. Delete clips that are blurry, shaky, or don’t add any value. Organization saves you hours of editing later.
2. Trim and Cut Smartly
Nobody wants to watch long pauses, “uhhs,” or irrelevant chatter. Trim your clips to keep only the best moments. Use jump cuts (quick cuts between scenes) to maintain a fast, engaging pace.
3. Add Transitions for Smooth Flow
Transitions make your vlog feel connected rather than choppy. A simple fade, zoom, or slide can keep the video smooth. But remember—less is more. Overusing fancy transitions can feel distracting.
4. Use Background Music to Set the Mood
Music is one of the most powerful tools in vlog video editing. It sets the vibe—energetic, calm, emotional, or fun. Always use royalty-free or licensed music to avoid copyright issues on YouTube or Instagram.
5. Enhance with Text and Graphics
Adding text helps in many ways:
- Titles to introduce your vlog.
- Subtitles for clarity.
- Fun captions or stickers to highlight moments.
This is especially useful if your viewers watch without sound.
6. Work on Color and Lighting
Sometimes your footage may look too dark, dull, or washed out. A little color correction—adjusting brightness, contrast, and saturation—can make your vlog look professional and vibrant.
7. Add Sound Effects
Sound effects like clicks, whooshes, or laughs can make your vlog more fun and lively. Use them sparingly to emphasize moments without overwhelming viewers.
8. Keep the Story Flowing
Remember, every vlog should feel like a story. Whether you’re sharing a travel vlog, a day-in-the-life, or a tutorial, arrange your clips in a way that makes sense and keeps viewers curious about what’s next.
9. Export in High Quality
Once you’re happy with your vlog, export it in HD (1080p or higher). This ensures your content looks sharp on YouTube, TikTok, or any platform.
You may also like to read these posts:
Best Photo Banane Wala Editor Apps For Android – Aarya Editz
Best Photo Banane Application Download 2025 – Aarya Editz
What Is Face APK? Pros, Cons & Safety Tips – Aarya Editz
Best Photo Edit Karna Background For Beginners – Aarya Editz
Best Tools for Vlog Video Editing
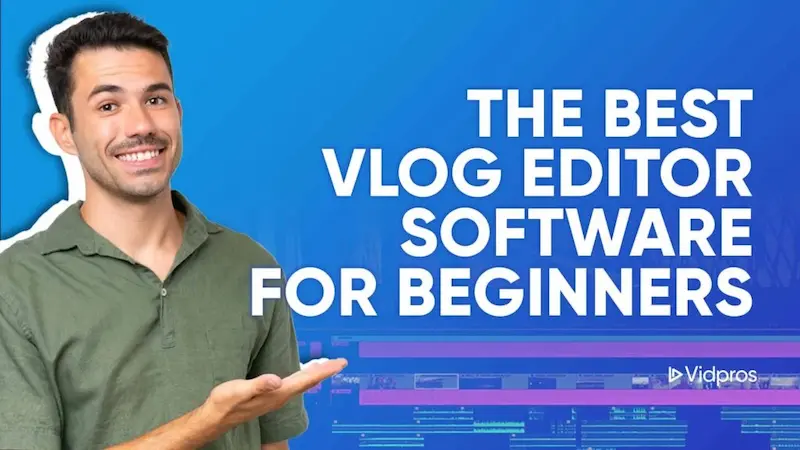
You don’t need expensive gear to get started. Here are some great tools:
- For Beginners:
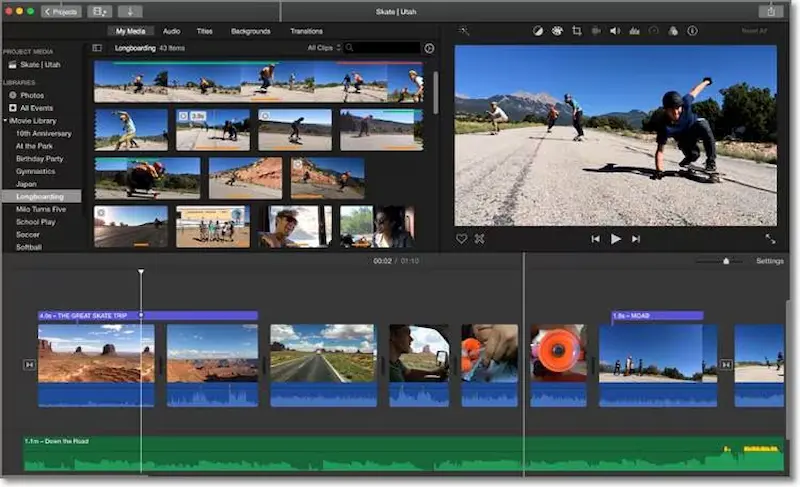
- iMovie (Mac/iPhone users)
- Filmora (easy interface with cool effects)
- InShot (mobile editing app)
- iMovie (Mac/iPhone users)
- For Intermediate to Advanced Users:
- Adobe Premiere Pro (professional-grade)
- Final Cut Pro (Mac users)
- DaVinci Resolve (great for color grading)
- Adobe Premiere Pro (professional-grade)
Pick the one that matches your comfort level. Remember, the best tool is the one you actually use.
Pro Tips to Master Vlog Video Editing
- Keep intros short—viewers decide in the first 10 seconds if they’ll keep watching.
- Use jump cuts to speed things up when needed.
- Don’t overdo effects; simple editing often works best.
- Always think from the viewer’s perspective: “Would I enjoy watching this?”
- Save your projects frequently—nothing hurts more than losing hours of editing progress.
Common Mistakes to Avoid in Vlog Video Editing
- Making the vlog too long: Short, punchy videos usually perform better.
- Using copyrighted music: It can get your video muted or taken down.
- Overloading with effects: Too many transitions or filters can feel amateurish.
- Ignoring audio quality: Bad sound will make people click away faster than bad visuals.
Final Thoughts
At the end of the day, vlog video editing is about bringing your personality and story to life. It’s not about having the fanciest software or craziest effects—it’s about creating content that feels authentic and enjoyable to watch.
Start simple, practice often, and let your editing style evolve naturally. With time, you’ll find a rhythm that matches your personality and connects with your audience.
Remember: your raw footage shows what you saw, but your editing shows how you felt. That’s what makes vlogs powerful.
FAQs
Q1. What is vlog video editing?
Vlog video editing is the process of trimming, arranging, and enhancing raw footage to create an engaging final vlog. It includes cutting unwanted parts, adding transitions, music, text, and sometimes effects to make the video more entertaining and professional.
Q2. Do I need expensive software for vlog video editing?
Not at all! Beginners can start with free or affordable tools like iMovie, InShot, or Filmora. As you gain experience, you can move to advanced programs like Adobe Premiere Pro, Final Cut Pro, or DaVinci Resolve.
Q3. How long does it take to edit a vlog?
It depends on the length of your vlog and how detailed your edits are. A simple vlog may take 1–2 hours, while a highly polished one with effects, music, and color grading could take several hours or even a day.
Q4. What makes a vlog engaging during editing?
Keeping intros short, adding music, using clean cuts, and maintaining a fast pace keeps your vlog engaging. Viewers love content that feels dynamic, clear, and to the point.
Q5. How can I avoid copyright issues in vlog video editing?
Use royalty-free or licensed music and graphics. Platforms like YouTube have free music libraries, and websites like Epidemic Sound or Artlist offer safe options for creators.