
Introduction
Transform Your Photos with These Stylish Pic Edits: Tips and Tricks for Stunning Visuals Have you ever scrolled through social media and stumbled upon photos that seem effortlessly perfect? The colors pop, the details shine, and the overall vibe feels just right. The truth is, those stunning visuals are rarely straight out of the camera—they’re the result of thoughtful editing. Whether you’re a seasoned photographer or just love capturing moments on your smartphone, the right editing techniques can transform your photos into stylish masterpieces.
In this blog post, we’ll dive into practical tips and tricks that will help you elevate your images. From basic adjustments to creative tweaks, you’ll learn how to enhance colors, refine details, and create a unique style that makes your visuals stand out. Ready to unlock the full potential of your photos? Let’s get started.
The Basics: Preparing for Editing
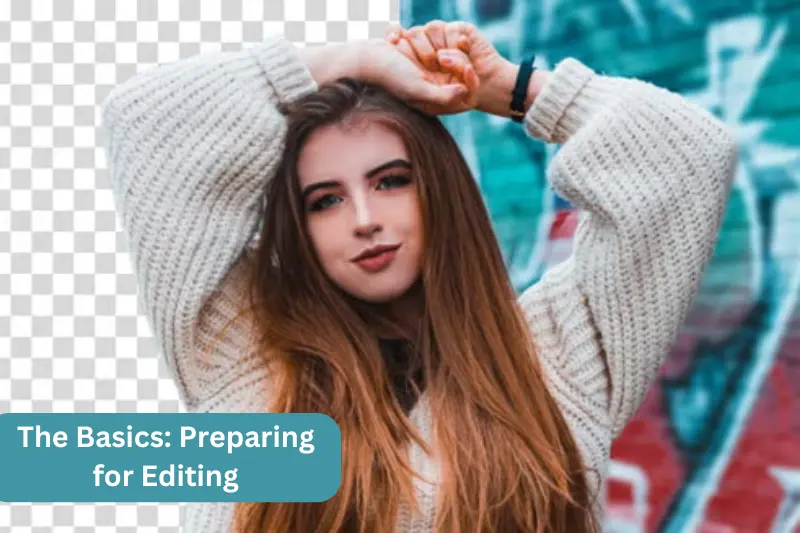
Great editing begins with a strong foundation, and that means paying attention to the quality of your original photo. A well-composed image with good lighting, sharp focus, and a clear subject provides the perfect canvas for creative enhancements. Before you start editing, here are some key steps to set yourself up for success.
First, always aim for proper exposure when capturing your photo. Overexposed or underexposed shots can be difficult to fix later without losing detail. If possible, shoot in RAW format rather than JPEG. RAW files retain more information about the image, giving you greater flexibility to adjust elements like brightness, color, and contrast during editing.
Choosing the right tools for your editing process is also crucial. Apps like Snapseed and Lightroom Mobile are excellent for beginners and offer robust options for fine-tuning your images. If you prefer working on a computer, professional software such as Adobe Photoshop or Lightroom provides even more control and creative possibilities.
Finally, always keep your vision in mind. Whether you’re aiming for a natural, polished look or something more artistic and dramatic, having a clear idea of the final result will guide your editing choices and ensure your efforts align with your creative goals.
You May Also Like It:
How To Edit Photos With Snapseed App – Complete Detail – Aarya Editz
16K Photo Enhance In Just 1 Click – Complete Detail – Aarya Editz
Picsart Charistmas Special In Just Photo Editing – Aarya Editz
Essential Editing Techniques for Stylish Photos
Editing is where your photos truly come to life, allowing you to refine and enhance their best features. Mastering a few essential techniques will help you achieve polished and visually striking results while maintaining a balanced and natural look. Here are the key steps to take your photos to the next level:
Enhancing Colors
The colors in a photo can make or break its appeal. Adjusting saturation and vibrance helps bring out the richness of hues, while tweaking the white balance ensures your colors look natural. Aim to enhance colors subtly—oversaturation can make an image appear overly processed. Focus on creating a harmonious palette that draws attention to your subject.
Balancing Exposure
Exposure adjustments are vital to achieving the right mood and depth in your photo. Fine-tune highlights, shadows, and mid-tones to reveal hidden details and create balance. For example, reducing overly bright highlights can restore lost details in the sky, while lifting shadows can add depth to darker areas. Many editing tools include sliders or curves for precise control.
Sharpening Details
A sharp, clear image is visually impactful. Use sharpening tools to emphasize textures, edges, and fine details, especially on the subject. Be cautious not to overdo it, as excessive sharpening can create a harsh, unnatural look. For low-light photos, balance sharpening with noise reduction to minimize grainy textures.
Adjusting Contrast
Contrast adjustments add depth and drama by enhancing the differences between light and dark areas. Boosting contrast slightly can make your image more dynamic, but too much can result in loss of detail. Experiment with contrast levels until your photo looks balanced and engaging.
Cropping and Straightening
A well-composed frame draws attention to your subject. Use cropping tools to eliminate distractions or reframe your photo for a more striking composition. Straightening the horizon line or aligning key elements creates a professional, polished look.
Creative Editing Tips for Unique Styles
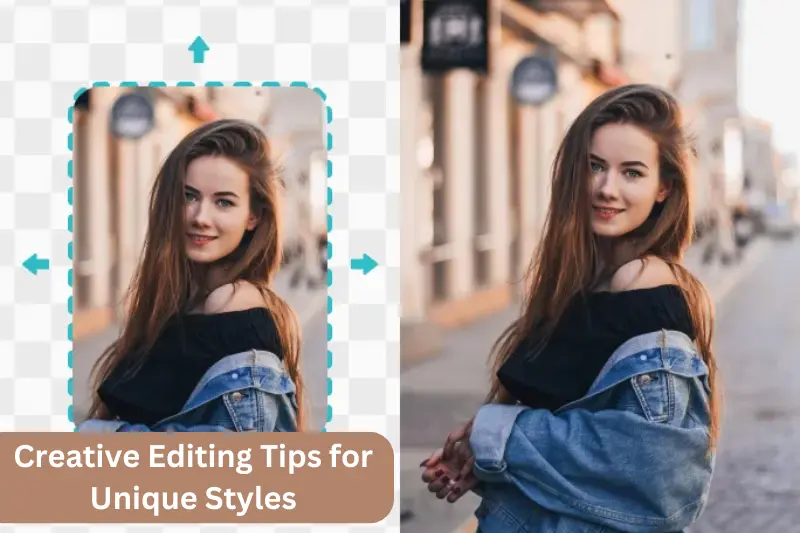
Once you’ve mastered the basics, creative editing allows you to infuse personality and uniqueness into your photos. These techniques go beyond standard adjustments, helping you craft visuals that reflect your artistic vision and stand out from the crowd. Here are some ideas to spark your creativity:
Experiment with Filters and Presets
- Filters and presets are a quick way to transform the mood of your photo. Whether you’re going for a nostalgic vintage vibe, a clean modern look, or dreamy pastel tones, filters can set the stage. Many apps, like VSCO and Lightroom, offer customizable presets, allowing you to tweak them to match your aesthetic while maintaining consistency across your images.
Add Texture for Depth and Character
- Incorporating textures like film grain, light leaks, or subtle vignettes can give your photos an artistic edge. Grain creates a retro film-like effect, while overlays like bokeh or lens flares add softness and intrigue. These elements can elevate a simple photo into something more emotive and memorable.
Play with Cropping and Framing
- Creative cropping can completely change the narrative of a photo. Tight crops draw attention to intricate details, while wide crops highlight the setting and context. Try unconventional compositions, such as off-center framing or negative space, to create visual interest and a more dynamic feel.
Use Selective Edits for Precision
- Selective editing tools, like brushes and gradients, allow you to enhance specific areas of a photo. Brighten the subject, soften the background, or add a pop of color to a particular element to guide the viewer’s eye. These targeted adjustments can make your photos look polished and professional.
Explore Color Grading for Dramatic Impact
- Color grading is a technique often used in films to evoke specific emotions. Applying complementary tones to highlights and shadows—such as warm highlights and cool shadows—can add cinematic drama to your photos. Tools like Lightroom’s split-toning feature make this process straightforward.
Layer Overlays and Double Exposures
- For a bold artistic touch, experiment with overlays or create double-exposure effects. Combine two images to blend subjects with abstract patterns, landscapes, or textures for surreal and visually captivating results. Apps like PicsArt or Photoshop offer tools for layering and blending images.
Incorporate Text and Graphics
- Adding text or graphics can transform your photo into a story or statement. Use this technique for social media posts, album covers, or promotional visuals. Tools like Canva provide easy-to-use templates for stylish typography and design.
Tips for Social Media-Ready Visuals
- In today’s digital world, the quality of your photos can make or break their impact on social media. With a little preparation and the right editing techniques, you can create eye-catching visuals that not only stand out but also engage your audience. Here’s how to make your photos social media-ready:
Optimize Size and Resolution
- Each platform has its own recommended dimensions for optimal image display. For instance, Instagram posts look best at 1080×1080 pixels for square images or 1080×1350 pixels for portraits. Ensure your photos are high resolution to prevent pixelation, but keep file sizes manageable to avoid slow loading times.
Maintain Consistency in Style
- A cohesive aesthetic across your posts can elevate your profile, whether you’re building a personal brand or curating a business feed. Stick to a consistent color palette, tone, or editing style to create a unified look that aligns with your identity. Presets and filters are excellent tools to help maintain this consistency.
Focus on Composition
- Good composition is key to creating visually appealing photos. Use the rule of thirds or center your subject strategically to capture attention. For social media, consider how your image will appear in a grid or alongside other posts. Balance is important to make your feed visually pleasing as a whole.
Leverage Trending Themes and Formats
- Stay updated on current trends, such as muted tones, bold contrasts, or vintage aesthetics. Incorporate popular formats like reels, carousels, or before-and-after comparisons to increase engagement. Using the right style or theme can help your content feel fresh and relevant.
Add Text and Overlays Thoughtfully
- Adding text or overlays can make your visuals more informative or engaging, especially for promotional content. Keep the text legible and minimal, ensuring it complements rather than overshadows the image. Apps like Canva and Over are excellent for creating professional-looking designs.
Engage with Stories and Short-Lived Content
- Stories often require a different approach than static posts. Use dynamic elements like GIFs, polls, or animated text to make your visuals interactive. Incorporate bold, eye-catching edits that grab attention quickly, as stories are consumed rapidly.
Test Brightness and Visibility on Mobile
- Since most social media content is viewed on mobile devices, ensure your photos are easy to see and vibrant on smaller screens. Brighten your images slightly, enhance contrast, and test how they appear on different screen sizes to make them universally appealing.
Include a Clear Focal Point
- In a fast-paced social media environment, clarity is crucial. Make sure your image has a clear subject or point of focus that immediately grabs attention. Whether it’s a person, product, or landscape, your viewer should instantly know where to look.
Common Mistakes to Avoid
While editing can elevate your photos to stunning heights, it’s easy to fall into traps that can detract from your final result. Knowing what to avoid is just as important as mastering the techniques. Here are some common mistakes to steer clear of:
Overediting
- One of the most frequent missteps is overdoing it with adjustments. Excessive saturation, sharpness, or contrast can make your photo look unnatural and overwhelming. Subtlety is key; the best edits enhance without overshadowing the original subject or story.
Neglecting the Original Image
- Starting with a poorly composed or low-quality photo and expecting editing to fix everything can lead to disappointing results. While editing is powerful, it’s not a miracle solution. Always aim to capture the best possible image before jumping into post-processing.
Ignoring White Balance
- Overlooking the importance of white balance can leave your photos looking off. A warm or cool cast might distract from the intended mood. Take time to adjust the white balance to ensure the colors appear natural and consistent with the scene.
Using Too Many Filters
- Filters are a fantastic way to add mood or style, but layering too many or using overly dramatic ones can make your photo look artificial. Stick to one or two that align with your vision and adjust their intensity to suit your image.
Clipping Highlights and Shadows
- When adjusting brightness or contrast, it’s easy to lose details in the brightest or darkest parts of your photo, known as clipping. Always check your histogram or use highlight and shadow recovery tools to preserve important details.
Overlooking Noise and Grain
- Increasing brightness, shadows, or clarity too much can amplify noise in your photo, especially in darker areas. Use noise reduction tools sparingly to clean up grain while maintaining essential details.
Forgetting About Composition
- Editing can’t fix a poorly composed shot. Cropping can help, but if the composition is weak, no amount of editing will fully salvage it. Focus on strong framing and balance when taking the photo to reduce the need for excessive cropping later.
Inconsistent Edits
- Applying wildly different styles to each photo can make your portfolio or social media feed look chaotic. Maintaining consistency in tone, color grading, and overall style is essential, especially if you’re building a personal or professional brand.
Failing to Save Originals
- Always save a copy of your original image before editing. If you’re not happy with the final result or want to revisit your edits later, having the original ensures you don’t lose your starting point.
Overlooking the Platform
- Editing for one platform but sharing on another without considering differences in size, resolution, or color display can lead to subpar results. Tailor your edits to the platform where the photo will be displayed.
You May Also Like It:
Ultimate Adobe Photoshop Hacks for Professional Creatives – Aarya editz
Blur Effect Video Editing Tutorial – Complete Guide
Lightroom Orange Effect Premium Dng Preset – Complete – Guide – Aarya Editz
Common FAQs About Transforming Your Photos with Stylish Edits
What’s the best app for photo editing?
The best app depends on your needs and skill level. For beginners, apps like Snapseed and Lightroom Mobile are great, offering powerful features with an easy-to-use interface. If you’re looking for more advanced editing options, Adobe Photoshop or Lightroom (desktop) are top choices for professional-level editing and precise control. Apps like VSCO and PicsArt also offer creative filters and effects for unique edits.
How do I know when I’ve overedited a photo?
Overediting often makes a photo look unnatural, with exaggerated colors, sharpness, or contrast. If your image begins to look “too perfect” or loses detail in highlights and shadows, it might be overdone. A good rule of thumb is to make subtle adjustments and step away from the image for a few minutes. Coming back with fresh eyes can help you spot any overdone areas.
Can I fix a blurry photo with editing?
Editing can help improve the appearance of a blurry photo to some extent, but it’s not a magic fix. Tools like sharpening can enhance the details, but if the blur is too severe, you may not be able to recover sharpness effectively. To minimize blur, always focus on proper camera settings and technique when taking the photo.
What is the best way to improve a photo’s colors?
Start by adjusting the white balance to ensure colors are accurate. Then, fine-tune the vibrance and saturation to enhance colors without making them look overly processed. Contrast can also play a significant role in bringing out the richness of your colors. Be sure to avoid oversaturating, as it can make colors look unnatural.
How can I make my photos look professional without expensive software?
You can achieve professional-looking results using free or affordable apps like Snapseed, Canva, or Lightroom Mobile. These apps offer a wide range of tools for adjusting exposure, contrast, and sharpness, as well as creative features like filters and textures. Focus on mastering basic editing skills, such as color correction and exposure balancing, and use consistent editing styles to maintain a polished look.
How do I maintain a consistent style for my social media feed?
To create a cohesive look, use the same set of editing techniques for every post. Stick to a particular color palette, filter, or preset that reflects your aesthetic. Make sure to adjust each photo in similar ways (e.g., using the same contrast, saturation, or exposure adjustments). Consistency in your editing helps create a recognizable visual identity.
What’s the difference between RAW and JPEG, and which should I use?
RAW files contain more image data and allow for greater flexibility in post-editing, especially when adjusting exposure, shadows, and highlights. JPEG files are compressed and have less data, which can result in a loss of quality during editing. If you want maximum control over your edits, shoot in RAW. However, JPEG is perfectly fine for casual photos or when file size is a concern.
How do I make my photos stand out on social media?
To make your photos stand out, focus on strong composition and a unique style. Try creative edits like using bold filters, adding textures or overlays, and experimenting with cropping. Also, make sure your visuals are optimized for the platform (e.g., square images for Instagram posts, portrait for Instagram stories). Engage with trending themes or formats to increase visibility and connect with your audience.
Should I always use a filter?
No, filters should be used thoughtfully. While filters can enhance your photo’s mood, they shouldn’t be relied upon for every image. Sometimes, a natural, unfiltered look can be more striking, especially when the focus is on lighting, texture, or composition. If you do use filters, choose ones that complement your photo without overpowering it.
How do I fix a photo that’s too dark or too bright?
If a photo is too dark, increase the exposure or lift the shadows to bring out more detail. You can also adjust the brightness selectively in darker areas using masking tools. For overexposed images, reduce the brightness and highlights. Be careful not to lose details in either the brightest or darkest areas by adjusting exposure in small steps.
Conclusion
And there you have it! With just a few simple editing tips and tricks, you can take your photos from good to great and make them truly stand out. Whether you’re tweaking the basics like brightness and contrast or experimenting with creative touches like filters and textures, the possibilities are endless. The key is to have fun with the process and let your creativity guide you.
Remember, the best edits enhance your photos without making them look overdone, so take your time, experiment, and always aim for a natural, balanced look. With practice, you’ll develop your own unique editing style that feels true to you.
So, next time you grab your phone or camera, take a moment to think about how you can transform that image into something even more stunning. Happy editing, and don’t forget to share your beautiful creations with the world.
Bonus: Quick Editing Hacks for Instant Impact
For those moments when you need a quick photo boost without diving deep into editing, here are a few time-saving tricks that can make your images pop in no time:
Use Auto-Adjust for a Fast Fix
- Most photo editing apps, including Snapseed and Lightroom, have an “Auto” or “Auto Adjust” button that applies automatic enhancements like exposure, contrast, and saturation. It’s a great starting point if you’re short on time, and you can fine-tune from there.
Apply a Subtle Vignette
- A soft vignette can instantly draw attention to the center of your image and create a more polished look. Most editing apps offer a simple slider to add a vignette effect, making it an easy way to enhance any photo quickly.
Enhance the Sky with a Gradient Filter
- If you have a photo with a dull or overexposed sky, use a gradient filter to add color or improve the details. This tool can help you brighten the clouds or add a touch of blue to a washed-out sky, giving the photo more visual interest.
Boost Your Subject with Selective Editing
- Quickly highlight the main subject of your photo by brightening it or adding a bit more contrast while leaving the background untouched. Many apps let you “brush” specific areas of the photo, so the focus remains on what matters most without needing to edit the entire image.
Use the Crop Tool to Improve Composition
- Even if your shot isn’t perfect, a quick crop can make a huge difference. Crop out distractions, align your subject according to the rule of thirds, or even change the aspect ratio to suit different platforms. A good crop can make your photo feel more professional in just seconds.
Add a Little Texture or Grain
- If your photo feels too “smooth” or digital, adding a touch of grain or texture can give it more character. This effect works particularly well for vintage or artistic shots, helping to create a more timeless, film-like quality.
Play with Color Curves for a Dramatic Effect
- In apps like Lightroom, adjusting the color curves is a powerful tool to add a unique color grading effect to your photo. A slight tweak to the RGB (red, green, blue) curves can give your photo a distinctive feel, whether you want to add warmth, coolness, or a cinematic tone.
You May Also Like It:
Snapseed Double Expoure Photo Editing – A Comprehensive Guide
Picsart Editing Background Colour Change – Detail Guide – Aarya Editz
Snapseed Background Colour Change Photos Editing – Aarya Editz
Aqua And Yellow Free Lightroom Preset – Detail Guide – Aarya Editz.