
Oil pastel colour drawing is one of the most exciting and accessible art forms, offering vibrant hues, smooth texture, and endless creative possibilities.
Whether you’re new to art or already have some experience, oil pastels are a fantastic medium that can help bring your ideas to life in a unique and easy way.
Let’s dive into everything you need to know about oil pastel drawings, from choosing the right materials to mastering blending techniques.
By the end of this guide, you’ll be well-equipped to start your own colourful journey with oil pastels.
What Are Oil Pastels?
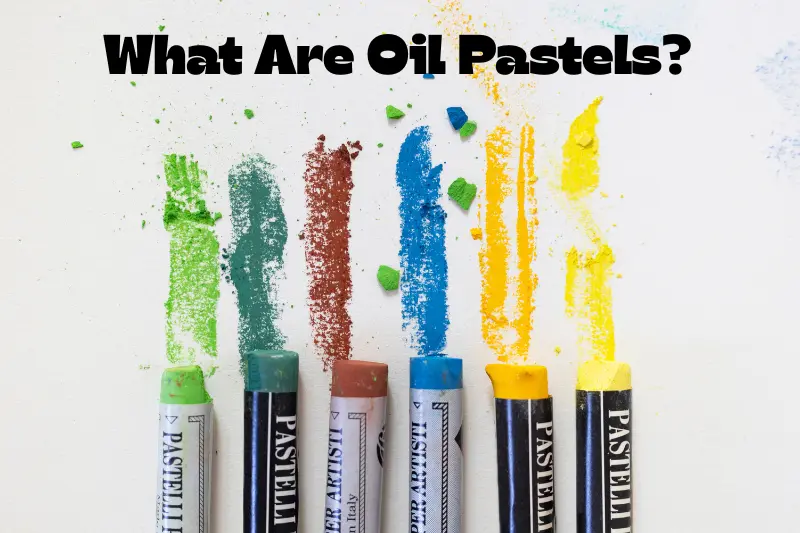
If you’ve never used them before, you may be wondering, “What exactly are oil pastels?” Oil pastels are art supplies made by combining pigments (colours) with a binder of oil and wax. This creates a creamy texture that glides smoothly onto paper or canvas.
Unlike soft pastels, which can be dusty and fragile, oil pastels are more durable and can be easily blended to create rich, intense colours.
What makes oil pastels so special is their ability to create vibrant colours that pop off the page.
Plus, they don’t require any water or brushes—just your hands or blending tools! With a little practice, you’ll find yourself experimenting with layering and blending techniques that give your artwork depth and personality.
Why Should You Try Oil Pastels?
If you’re wondering whether oil pastels are the right medium for you, here are some reasons why they might be:
- Vibrant Colours: Oil pastels create rich, intense colours that make your artwork stand out.
- Easy to Use: There are no complicated setups. You just need the pastels and paper to get started.
- Versatility: They can be used for anything from abstract art to realistic portraits. You can even create mixed media pieces.
- Blendability: Oil pastels are perfect for blending and layering, which allows you to create smooth transitions and gradients.
- Quick Drying: Unlike paints, oil pastels don’t need drying time, allowing you to work on your art in one go.
What You’ll Need to Start Your Oil Pastel Colour Drawing
Before you begin, make sure you have the following supplies:
- Oil Pastels: There are plenty of sets available, and you don’t need to start with a large set. A basic 12 or 24-colour set is ideal for beginners. Make sure the pastels are of good quality to get the best results.
- Paper: Choose a thick, textured paper. Special pastel papers work well, but you can also use mixed-media or watercolour paper. The texture helps the pastels grip and blend better.
- Blending Tools: While your fingers are great for blending, you might also want to use blending stumps, cotton swabs, or soft tissue for smoother results.
- Fixative (optional): If you want to preserve your artwork and prevent smudging, you can use a fixative spray. This is especially helpful if you plan to frame your artwork.
Step-by-Step Guide: How to Create Your Own Oil Pastel Colour Drawing
Now that you have your materials, let’s walk through a simple process to create your first oil pastel colour drawing. Whether you’re drawing a landscape, portrait, or abstract piece, these steps will help you get started.
Step 1: Plan Your Artwork
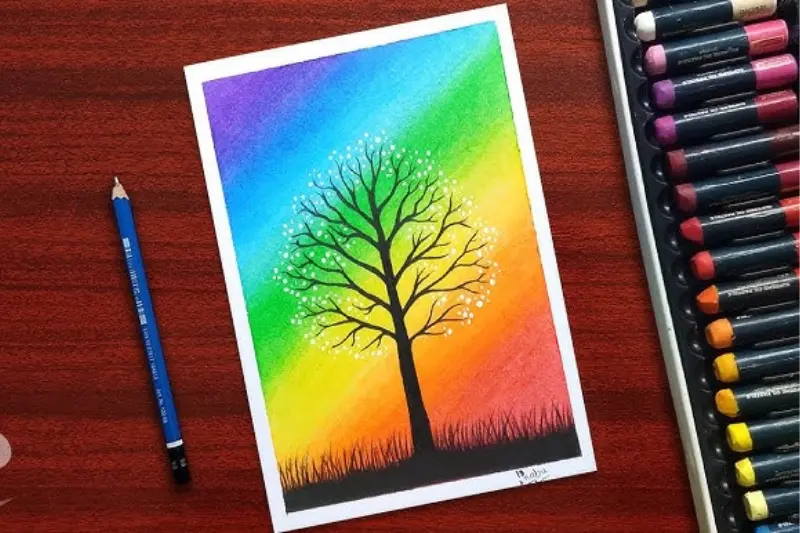
First things first: decide on your subject. What do you want to draw? It can be anything from a sunset to a simple flower, or even a dreamy abstract design. Keep it simple for your first drawing—focus on basic shapes and colours.
It’s helpful to sketch a light outline of your drawing with a pencil first. This will guide you as you apply the oil pastels, so you have a clear roadmap for your artwork.
Step 2: Choose Your Colour Palette
Next, pick out your colours! Oil pastels are known for their vibrant colours, so you’ll want to choose shades that complement each other.
Start with a simple colour scheme—perhaps a combination of 3 to 5 colours. You can pick complementary colours (like blue and orange) or go for a harmonious palette (like shades of blue and purple).
Step 3: Start with Light Colours
Start applying your oil pastels with the lightest colours first. This will help you build up layers and create depth in your artwork.
Don’t worry about perfect lines—just lay down a soft base of colour in the areas you want.
Step 4: Layer and Build Depth
Now comes the fun part! Layering and blending are key with oil pastels. Take your darker colours and gently layer them over the lighter ones.
Use your fingers or a blending stump to soften the lines and create smooth transitions between colours.
Oil pastels blend beautifully, so you can get that beautiful gradient effect with a little effort.
Step 5: Add Detail
Once your base layers are complete, it’s time to add more details. Use the tip of the pastel for fine lines and smaller areas.
If you want sharper edges, you can apply the pastels in a more controlled manner or even use a sharp edge of the pastel.
You can also go back in with lighter colours to highlight areas or add accents that make the drawing pop.
Step 6: Blend and Adjust
Blending is one of the best parts of working with oil pastels. As you blend, you’ll notice the colours mix smoothly together, allowing you to create a soft, painterly effect.
Don’t be afraid to experiment with different textures—press harder for bold strokes or use gentle pressure for a softer finish.
If you need to adjust, feel free to add more layers or blend again. The beauty of oil pastels is their flexibility.
Step 7: Final Touches
Once you’re happy with your drawing, take a step back and evaluate it. Do you need more shading, highlights, or details? Make any final adjustments.
If you’d like, you can spray your artwork with a fixative to protect it from smudging.
Tips for Oil Pastel Colour Drawing
- Experiment with Texture: Try different textures of paper to see how they affect your artwork. Rougher paper will hold more pastel and give you a more textured look, while smoother paper might give you softer results.
- Use Layers: Don’t be afraid to add layers of colour to build up your artwork. The more layers you apply, the richer the colours will be.
- Practice Blending: Blending is essential with oil pastels. Spend some time getting comfortable with it, and you’ll be able to create beautiful gradients and soft transitions between colours.
- Protect Your Artwork: Oil pastels are vibrant and beautiful, but they can be smudged easily. Consider framing your artwork or spraying it with a fixative once it’s finished to ensure it lasts.
Conclusion
Oil pastel colour drawing is a fun and rewarding art form that anyone can try. Whether you’re a beginner or an experienced artist, oil pastels offer a versatile, vibrant way to create art. With a little practice, you’ll be amazed at how quickly you can develop your skills and create stunning pieces.
Remember, the beauty of oil pastels is their ability to be forgiving and adaptable. Don’t be afraid to experiment, and most importantly, have fun with the process!
So, grab your pastels and paper and start creating your own colourful masterpieces today.
FAQs
1. What are oil pastels?
Oil pastels are a type of drawing tool made from pigment, wax, and oil. They are similar to crayons but have a softer, smoother texture and a vibrant, rich finish. They are perfect for creating layered, blended artwork with bold colours.
2. Can I use oil pastels on any type of paper?
Yes, but it’s recommended to use a heavier, textured paper to get the best results. Oil pastels work best on papers with a bit of tooth (texture), as this helps the pigment adhere better and allows you to layer and blend more effectively.
3. How do I blend oil pastels?
Blending oil pastels is easy and fun! You can blend by using your fingers, a blending stump, or a cotton swab. Gently rub the colours together in a circular motion to soften the edges and create smooth transitions between hues. Experiment with different blending tools to achieve the desired effect.
4. Can I mix oil pastels with other media?
Yes, you can mix oil pastels with other media like watercolours, acrylics, or even coloured pencils. However, keep in mind that the texture and blending properties of oil pastels might differ from those of other mediums, so it’s a good idea to test combinations on a small area first.
5. How do I preserve my oil pastel artwork?
To preserve your oil pastel artwork, consider using a fixative spray. A fixative helps to protect the drawing from smudging and dust. Once sprayed, let the artwork dry completely. Additionally, framing your artwork behind glass can help protect it from environmental damage.